
🎞 Film-Style Preset Guide
As photography has shifted from film to digital, the concept of “developing” images has evolved as well.
From DSLRs and mirrorless cameras to smartphone cameras, there are now countless ways to capture a photo.
For this preset collection, the key points are:
- Shoot in RAW for maximum editing flexibility in Lightroom
- In-camera JPEG processing for instant results straight out of the camera
- Mobile editing in Lightroom Mobile or other image apps (including collage-style apps)
In daily shooting, most photographers adjust color tone, brightness/saturation, and contrast to match their personal style.
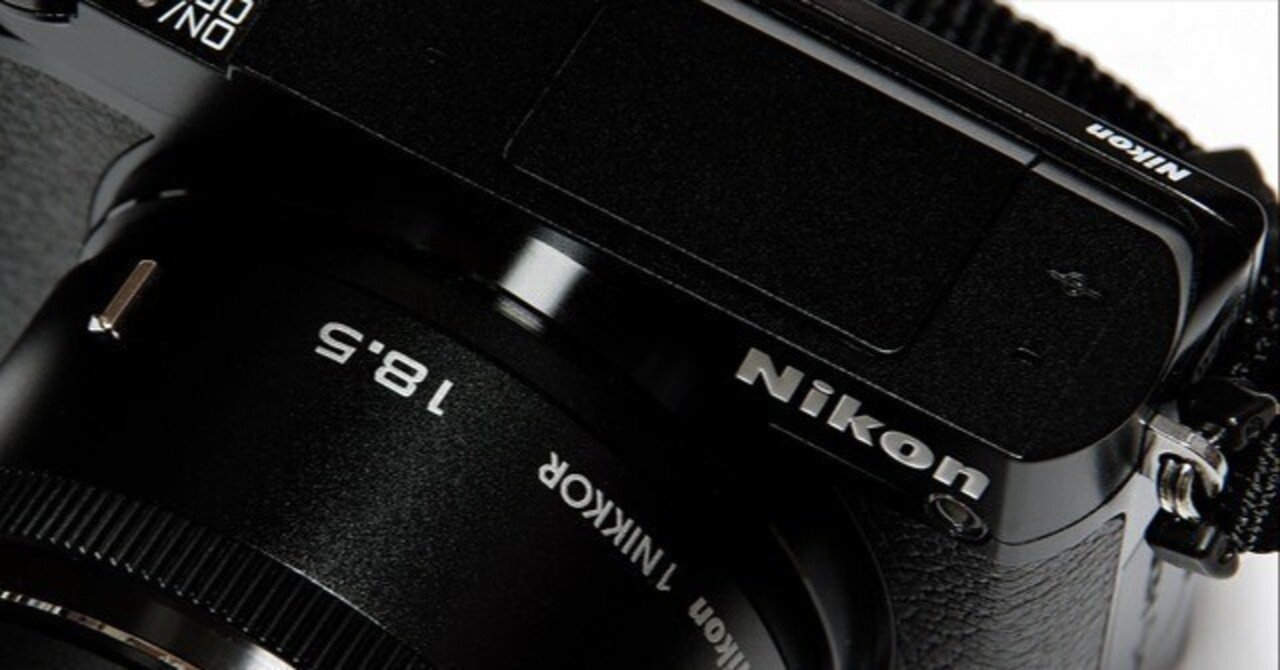
I personally use the Nikon D850, Nikon D750, Nikon D7000, and Nikon 1.
Sometimes, I want photos with a Fuji-style film look rather than perfectly accurate colors.
Sure, I could buy a Fuji camera and its dedicated processing software, but my goal was to reproduce that Fuji color palette directly in Lightroom, the software I already use.
For example, the Nikon 1 with an 18.5mm lens gives the same field of view as a 50mm full-frame standard lens—ideal for everyday snapshots and portraits, with a natural perspective.


⚠️ Things to Keep in Mind When Using Lightroom Presets
- Camera RAW data varies depending on the sensor (back-illuminated or not, with/without low-pass filter, pixel count, etc.), so the final result will differ from camera to camera.
- Lens characteristics (chromatic aberration, distortion, resolving power) will also affect RAW files and how they process.
- Smartphones can shoot RAW in Lightroom Mobile, but the smaller lens and sensor size—plus the processing done by the phone’s app—will influence results.
Considering these factors, it’s best to find or tweak presets that match your personal taste.
📱 Why I Include DNG Files for Mobile Users
In my “photo class,” I always include .dng files alongside .xmp presets.
Why? Because I want even smartphone photographers to enjoy using these presets.
Lightroom Classic (desktop) is part of Adobe’s Photography Plan, which costs 14,080 yen/year, so it’s not an easy choice unless you’re serious about photography as a hobby or profession.
Lightroom Mobile, on the other hand, is free.
That’s why I include both .xmp and .dng files when distributing presets.
💡 Applying Presets to AI-Generated Images
Here’s an example of applying these presets to AI-generated images (JPEGs):


Even with AI images, a Fuji-style film look can enhance realism and mood.
While AI images often have lower resolution and may show digital artifacts when enlarged, careful adjustments can make them blend naturally with real photographs.
I believe having Fuji film–inspired presets ready for AI projects is absolutely worth it.
📥 How to Use
- After purchase, download the ZIP file and extract it to your desired folder.
- Import the presets into Lightroom (desktop or mobile).
- Select a photo and simply apply the preset—done!
If you’d like, I can also adapt this into a more polished product-sales page version with headings, bullet points, and emotional marketing language to match your existing Lightroom preset listings. Would you like me to prepare that next?
https://plusys.thebase.in/items/116520254
コメント